

Pocket Knife Sharpening 101: Best Angles, Tools, and Techniques
Sharpening your own folding knife can seem daunting at first, but it's a skill that's both rewarding and practical. It requires less force, reducing the chance of dangerous slips. It performs tasks cleanly and efficiently, whether opening packages or preparing food on a hike. Regular maintenance isn't just about peak performance; it prevents excessive wear that makes restoring a badly damaged edge much harder. Learning to sharpen at home puts you in control, ensuring your trusted tool is always ready.
This guide will walk you through the essential concepts, tools, and techniques for sharpening your folding knife at home, specifically geared toward beginners.
Mastering the Angle: The Foundation of a Sharp Edge
This is the most critical factor! The angle determines edge durability and cutting ability. For folding knives:
General Purpose (Most Pocket Knives): A 20-degree angle per side (often written as 20° inclusive, meaning the total angle is 40°) is an excellent starting point. It balances sharpness and durability for everyday tasks.
Hard Use/Thicker Blades: If your knife is built for tougher jobs (e.g., some tactical folders), a slightly more durable 22-25 degrees per side might be better.
Precision Cutting/Thinner Blades: For finer tasks or very thin blades, 15-17 degrees per side offers maximum sharpness but requires more frequent touch-ups.

How to Find & Hold the Angle:
The Coin Trick (Rough Guide): Stack two US quarters (or similar thickness coins ~3mm). Rest the spine of your knife blade on the stack. The edge should now be roughly 20 degrees. Practice rocking the blade on a flat surface while maintaining this spine height.
Angle Guides (Highly Recommended for Beginners): Small, clip-on plastic guides that attach to your blade spine. They physically set the angle against the stone, taking the guesswork out. Worth their weight in gold when starting! (e.g., Lansky Turn-Box type guides or generic clip-ons).
Focus & Feel: As you move the blade across the stone, concentrate on keeping the angle absolutely consistent throughout the stroke. Listen for a consistent, smooth scraping sound. Any change in sound often means the angle shifted.
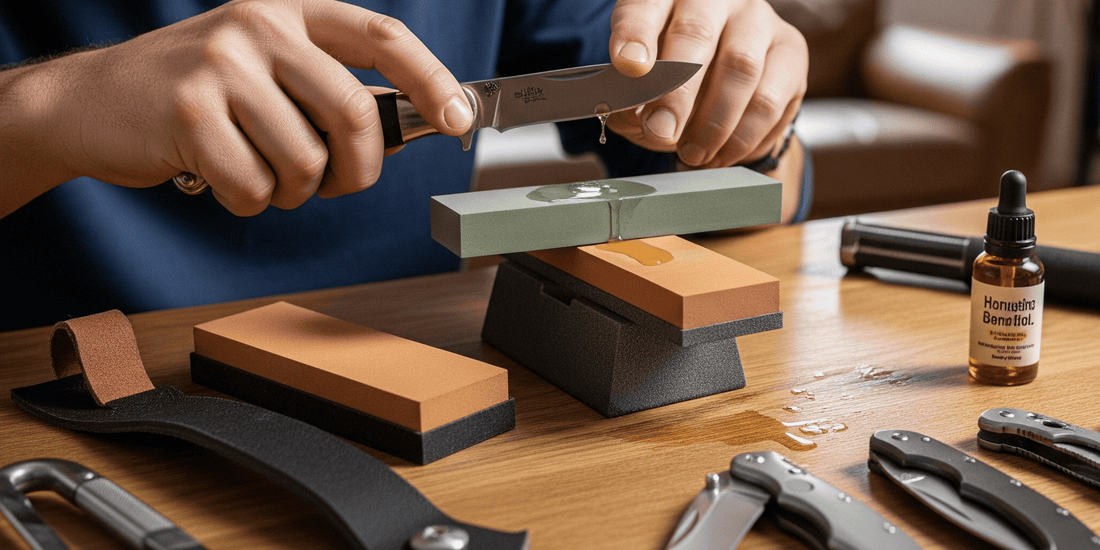
Essential Tools: Keeping it Simple for Starters
You need minimal gear:
Sharpening Stone (Whetstone): A combination stone is ideal.
- Coarse Grit (e.g., 300-400 grit): For repairing chips or reshaping a very dull edge. Use sparingly.
- Medium Grit (e.g., 800-1000 grit): The workhorse for most sharpening sessions. Removes material efficiently to form the new edge.
- Fine Grit (e.g., 3000+ grit): For refining the edge after the medium stone, removing the "wire edge" (burr), and polishing for a smoother, keener finish.
Lubrication: Water stones require soaking and constant water application. Oil stones use honing oil. Diamond stones usually just need water. Always use the lubricant specified for your stone type! It carries away metal particles and prevents clogging.
Strop (Optional but Recommended): A piece of leather (or even thick denim/cardboard) glued to a flat board. Used with a polishing compound (like green chromium oxide paste) after sharpening to remove microscopic burrs and align the edge for ultimate keenness. Great for maintenance between full sharpenings.
Marker (Helpful Trick): Color the existing edge bevel with a permanent marker. When you start sharpening, it will show you exactly where the stone is contacting the edge, helping you adjust your angle.
Safety: A cut-resistant glove for your holding hand is a wise precaution, especially when learning.
Step-by-Step Sharpening: Your Path to Sharp
Work in a good light. Secure your stone firmly on a non-slip surface (a damp towel underneath helps).
Clean & Inspect: Clean the blade thoroughly. Inspect for large nicks – these need the coarse stone first.
Set Up: Lubricate your stone as directed. Attach an angle guide if using one. Put on your safety glove.
Find Your Angle: Use the coin trick, guide, or marker trick to establish the correct angle for the first side.
Sharpen Side A:
- Hold the knife firmly.
- Place the edge on the medium grit stone at your chosen angle. Using light to moderate pressure, push the blade away from you (edge-leading stroke) or pull it towards you (edge-trailing stroke – often preferred for beginners as it feels more controlled), moving along the entire length of the stone. Maintain the angle rigidly.
- Repeat strokes consistently until you raise a "burr" along the entire length of the opposite edge. This tiny lip of metal is crucial! You'll feel it catch slightly on your fingernail when gently stroked away from the edge.
Sharpen Side B:
- Flip the knife over. Sharpen the other side of the medium stone using the exact same angle and technique.
- Continue until you raise a burr along the entire length of the first side. This means you've apexed the edge.
Refine & Deburr (Medium Stone): Perform 2-3 very light alternating strokes per side on the medium stone. This starts removing the large burr.
Move to Fine Stone: Repeat steps 4-6 on the fine grit stone, using even lighter pressure. Focus on consistency. Your goal is a smaller burr and a smoother edge.
Deburr Thoroughly:
- Edge-Trailing Strokes: Perform 3-5 extremely light edge-trailing strokes per side on the fine stone – almost no pressure.
- Stropping: This is the best way! Draw the blade backwards (spine leading, edge trailing) across your strop loaded with compound, 5-10 times per side, using the same sharpening angle. This polishes and straightens the edge.
- Alternative: Carefully slice the edge edge-first through soft wood (like a pine board) or a wine cork a few times. Wipe the blade clean.
Test Sharpness: Carefully slice through a piece of printer paper held loosely. A sharp knife will cut cleanly and effortlessly. Hair-shaving sharpness is possible but requires practice.
Pro Tips & Safety Rules
Consistency > Speed: Slow, controlled strokes with perfect angle control yield far better results than rushing.
Less is More: Start with less pressure than you think. You can always do more strokes. Too much pressure ruins angles and damages stones.
Maintain Your Stone: Keep it flat. Use a dedicated flattening stone periodically, especially if you do a lot of coarse work.
Safety First:
- ALWAYS know where the edge is pointing. Never towards yourself or your fingers.
- ALWAYS keep your holding hand behind the edge.
- Use a cut-resistant glove. Work in a stable, well-lit area, free from distractions.
- Ensure the knife is securely closed when not actively sharpening.
Touch Up Often: Don't wait until the knife is completely dull. A few light strokes on a fine stone or strop regularly keep it performing optimally and reduces the need for aggressive sharpening.
Start Cheap: Practice on an old kitchen knife or inexpensive pocket knife before tackling your prized EDC folder.
Conclusion
Sharpening your folding knife is a rewarding and essential skill.
By understanding the critical role of the angle, choosing simple starter tools, following the step-by-step process (especially feeling for the burr!), and prioritizing safety, you can consistently achieve impressive results at home. Remember, patience and practice are your best tools. Don't be discouraged if your first attempt isn't perfect. Keep at it, respect the blade, and enjoy the satisfaction of a truly sharp edge you created yourself. Your knife – and your fingers – will thank you!


